November blogging has often included some posts on this blog. So when my brother commented that a cross post on the family food blog was in order after my Company for Dinner post yesterday. , I decided to follow his advice. That meal worked out well and having the recipe/directions here is handy -- I've used this site for its recipes a number of times. Reasonably enough.
Meatloaf:
Preheat oven to 350 degrees.
Mix together, 1# or so of 85% ground beef or meat of your choice with
1 egg, beaten
3/4 cup bread crumbs (I make my own in my smoothie maker/blender from a heel of good bread)
2 T ketchup
1 T Worcestershire sauce
1 T dried parsley
1/2 cup diced onion (I buy it diced -- lazy, I know)
1/4 cup milk
salt and pepper
garlic powder
Mix together really well. Like squish it between your thumb and fingers until all of the breadcrumbs have completely disappeared. (I think this is important to having a meatloaf that doesn't fall apart.)
Put mixture in a buttered loaf pan. I used 1 T barbecue sauce as a glaze, smoothed thin with a spoon.
Bake at 350 degrees for 50 minutes, remove from oven and let it rest at least 10 minutes. Transfer to a serving plate with a spatula or serve it from the pan.
It's even better the next day as leftovers or sandwiches.
Roasted Butternut Squash
Poke the squash with a meat fork in a half dozen places. Microwave for 2 minutes, turn over, microwave for 2 more minutes. Let it sit while you make the meatloaf. Once that's in the oven --
Cut off the ends of the squash, cut in half, cut the halves in half, remove seeds, cut into slices. Put a sheet of aluminum foil on a cookie sheet, drizzle foil with olive oil, smear around. Arrange the squash slices artistically, drizzle with more olive oil, smear around. Salt and pepper. Bake on the rack below the meatloaf -- they'll be done about the same time, the squash cooks faster, so it works out.
I cook differently now than I did just a few years ago -- for a bunch of reasons. I may do this a few more times this month, just to archive some of those changes.
An Experimental Cooking Blog
A multi-author family blog for recipes and other food related stuff.
Thursday, November 7, 2019
Monday, November 5, 2018
15 minute meal
Cooking for two people is challenging these days, and eating out -- which used to be my fall back position when I didn't want to cook -- is difficult for a number of reasons. I've been looking through the frozen food section of the grocery store for ideas, and this is one I've used a few times now.
Mostly I follow package directions, though for the cauliflower rice I saute a little onion in butter in the pan. Maybe a little olive oil and some salt and pepper, too. It adds maybe 5 minutes and isn't really necessary.
Any riced cauliflower would do -- I planned to make "fried rice" cauliflower, with soy sauce and eggs mixed in, but all I had in the freezer was the stuffing flavor. (It tastes nothing like stuffing, but it is tasty with little bits of cranberry in it.) I found it at WalMart, just in time for the holidays, I guess. JB is a fan of this meal -- there's a beef and broccoli version that he also likes by PF Chang. The package says it is supposed to feed two, but we always have enough left over for JB to have it for lunch the next day.
Monday, January 15, 2018
Boxing Day
I made this on Boxing Day. This was so good that it has a definite chance to become a Boxing Day tradition.
We do not have the exact correct pan and rack combination for this but the roast fits into one of the pans that we do have and I just spread a few carrots on the bottom of the pan in lieu of a proper rack to lift the meat off the bottom.
Remove meat from refrigerator about two hours before cooking is to begin.
Preheat oven to 550.
No liquid.
Place roast in oven, immediately reduce heat to 350.
Roast 18 to 20 minutes to the pound for medium rare.
Increasingly as I mature I subscribe to the use of a meat thermometer. A thermometer really does give better results than just guessing. 130 for rare, 140 for medium. Remove from oven and let it rest for long enough to finish other preparations.
For information purposes I note that the pictured piece of meat cost about $45.
We do not have the exact correct pan and rack combination for this but the roast fits into one of the pans that we do have and I just spread a few carrots on the bottom of the pan in lieu of a proper rack to lift the meat off the bottom.
Remove meat from refrigerator about two hours before cooking is to begin.
Preheat oven to 550.
No liquid.
Place roast in oven, immediately reduce heat to 350.
Roast 18 to 20 minutes to the pound for medium rare.
Increasingly as I mature I subscribe to the use of a meat thermometer. A thermometer really does give better results than just guessing. 130 for rare, 140 for medium. Remove from oven and let it rest for long enough to finish other preparations.
For information purposes I note that the pictured piece of meat cost about $45.
Monday, November 6, 2017
Cabbage, sausage and noodles
This is going to be a previously never done, at least by me, triple post.
I am going to post this here today because I am making it here today.
I am also going to ante-post it to the date when the pictures were taken when I made this meal in Michigan in September.
And I am going to post it to the family cooking blog because this is cooking that I did (and am doing today) for members of the family.
So to start with, this is a pretty basic meal for which you might have most of the ingredients already on hand. What you might not have is a cabbage. I didn't have one today so I went out and got one. Cabbage is a favorite here and I am always open to ways to introduce it into the regular rotation.
Here's what it looked like on September 12 in Michigan. Note the most excellent slicing knife (the black handle) and the most excellent paring knife (white handle). Good tools lead to good results.
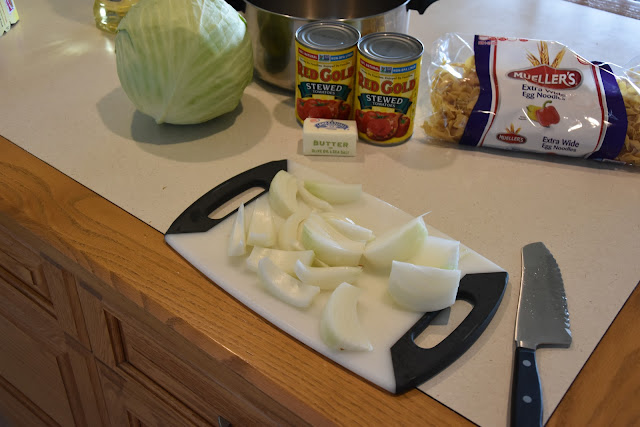
So what we have there is a head of cabbage, a large onion, a ring of kielbasa, olive oil, butter, a couple of cans of stewed tomatoes and some ribbon noodles.
Basic stuff but it IS going to be good.
Start with the polish sausage, the white knife renders it into slices. The slices go into the big pot with a healthy dollop of olive oil. What we seek is the traditional "browning".
The slicing knife makes its first appearance to produce large onion pieces, I like my onion pieces large.
The browning has gone on for a bit, the onions are now added. Here is where I also throw in that half stick of butter.
At this point the big pan is beyond the merely browning stage and is now in the starting to add flavor stage. At this point butter is good.
The slicer has been busy again (what a great knife!). About half of the cabbage has been reduced to cooking size. The polish sausage and onion mixture looks like it could easily support some big pieces of cabbage.
Throw in the cabbage, reduce heat, cover and simmer for 8 to 10 minutes, enough time to steam cook the cabbage.
Time to start the noodles. I cooked the whole package but I intend to use a little bit less than half. The rest will have to be consumed in other ways. Too many noodles overwhelm the cabbage. You want some noodles but need to keep in mind that this is a cabbage dish.
Time to start throwing it all together.
My experience is that a couple of cans of stewed tomatoes are going to provide just exactly what this concoction needs.
Mix it all together, you can probably turn off the heat at this point. Everything is warm, it will continue to cook on its own.
I don't have this today but in Michigan we had the ingredients for a highly qualified person to produce a side salad.
Sausage, cabbage and noodle hot dish with fresh salad.
The pictures are from Michigan and today in Minnesota we did not have the salad.
It was really good both times.
Saturday, March 25, 2017
Winter Salad
It seems that I can't blog to my regular blog on my tablet. I want to use the tablet for trips, so here I am. It will at least be a recipe post today, as I learn how to post photos here. This is a tasty salad, our first experience with it was in Florida this January. NCW made it, but the recipe came from her daughter-in-law. (Also a north country woman.)
This salad has been very popular with JB as well. Here is the ingredient photo.
(That wasn't as easy as I had hoped.) But the recipe is pretty simple. I rough chopped the cashews, and used about a third of a cup of the nuts and peas, about a fourth of a cup of cranberries, and a handful of finely shredded mozzarella.
Friday, March 24, 2017
Thursday, November 12, 2015
Variation on an old favorite -- Feta fish with tomatoes and baby bellas
Cross Listed from Santini60.Blogspot.Com
Since returning home from his stay in Holland Hospital, JB has a new set of dietary restrictions. Specifically, he is on a very low sodium diet. Two days spent preparing his food and counting grams has been instructive, and it turns out that if you cook all of your own food from scratch, sodium is a relatively easy thing to control. Tonight's dinner, for example, was based on the old family recipe for Jim's fish, but with a twist. Feta cheese has a lot of sodium in it -- but it provides a lot of flavor. So my approach was to use a couple of tablespoons of feta along with a Roma tomato and a handful of baby bella mushrooms for the topping. (That works out to a tablespoon of feta for each fish fillet, and a half of a Roma tomato each, plus some chopped up mushrooms. I added some dill, and ground a little pepper onto the fish.)
Here's the mixture ready to go on the tilapia. Just enough feta for flavor. Bake it at 375 for 20 minutes if the fillets are frozen.
I stir fried a carrot and some broccoli, based on Emmy's recipe for kale and carrots. I didn't have the courage to add garlic, though. I wasn't sure how it would work with broccoli. It turned out quite well without it.
I think Jimi would approve of the changes -- and it paired quite well with the carrots and broccoli.
Tuesday, November 10, 2015
Sesame Chicken
One of my all time favorite American-Chinese dishes is Sesame Chicken. So delicious, and so very, very bad for you. Breaded and fried chicken that is then coated in a sticky sweet-spicy sauce? Probably not health food. So when Andy and I discovered a recipe in our Joy of Cooking for Sesame Chicken that looked much healthier, we decided to give it a shot. Here's the recipe as we make it:
Step One: Boil a large pot of water and add the 3 bone-in chicken breasts. Cook 8-10 minutes until complete.
Step Two: While that is going on, do the following:
Enjoy!
The cast of characters. If you can't find Tahini Paste where you live, creamy peanut butter is a good substitute. However, you can then leave out the sugar. |
Step One: Boil a large pot of water and add the 3 bone-in chicken breasts. Cook 8-10 minutes until complete.
Step Two: While that is going on, do the following:
Step Three: Chop up one green onion/scallion and grate about that amount of ginger - it should be about 2 teaspoons worth when grated. |
Step Four: In a large mixing bowl, whisk together 1/4 cup tahini paste (or peanut butter) and 2.5 TB sesame oil until well combined. |
Step Five: To the tahini/sesame mixture, add the scallions, ginger, 2.5 TB soy sauce, 1 TB white vinegar, chili paste/Sriacha to taste (optional - I used a bit less than a TB), and 1 tsp sugar. |
Step Six: Whisk until well combined. |
Step Seven: Remove chicken from boiling water and allow to cool a bit until it can be handled; Shred the chicken and add to the bowl with the sauce. Mix thoroughly. |
Step Eight: Serve over rice of your choice, we went with brown, and some veggies on the side. Ours was sauteed kale and carrots with garlic. |
Tuesday, February 24, 2015
Back ribs with bone in
We had these in Flor-Ida and I was pleased yesterday to see them turn up in our local supermarket.
So I paired them with a dish I have attempted a couple of times while away from home but with sketchy results. I was confident that I would get a better result cooking at home.
The key is relatively slow cooking, a braising simmer if you will, to maintain the moisture in the pork. What we don't like about pork CHOPS for example, is that they are hard to cook while maintaining the moisture. They get dry and a bit tough.
These ribs have plenty of fat and after trying them again today I now emphasize that it is extremely important to get the bone in ribs. That cut is cheaper by 20 cents a pound or so. Further you are paying for the bone so even with the price differential you may be paying a bit more for the part you are actually going to get to eat. Santini has taught me that price sensitivity when it comes to food is the wrong approach. The results and what you are actually going to eat are what is important and the result for this meal is better with the bone in cut. Take the cheap cut, buy the bone.
So the cooking directions are as follows:
Cut the onion into large pieces, get it started with some oil.
As soon as the onion begins to soften start browning the pork in the same pan.
Add a braising base, I used some beer that one of the guests from the Oscar party left at our house, a particularly full body beer. You want something with enough carrying power to handle the strong tastes of the other ingredients.
Sauerkraut.
Get it all up to a boil then reduce heat and simmer.
I have done it uncovered but I now believe that I am trying to keep the moisture in so today I simmered covered (with an open vent in the cover).
At least 45 minutes, slow cook.
To judge when it is done I personally want the bone to begin to separate itself from the meat.
A perhaps interesting side note is that the kraut there on the left is Gino's homemade sauerkraut making one of its first appearances since it came out of the fermenting crock. At the time I removed it from the crock I wasn't real sure about whether I liked it or not.
So how was it today?
Excellent.
And everything transferred to the dinner plate.
The tiny potatoes came out almost as good here as they were in Flor-Ida but I think I will go with 4 and a half minutes next time instead of 5. The green beans were also microwaved so the only real cooking was the pork.
Which was excellent. TOPWLH pronounced it as possibly the best ever. She says that almost every time.
Sunday, February 22, 2015
Public Service Announcement for coffee drinkers
If you have one of these:
And you find yourself with some of this:
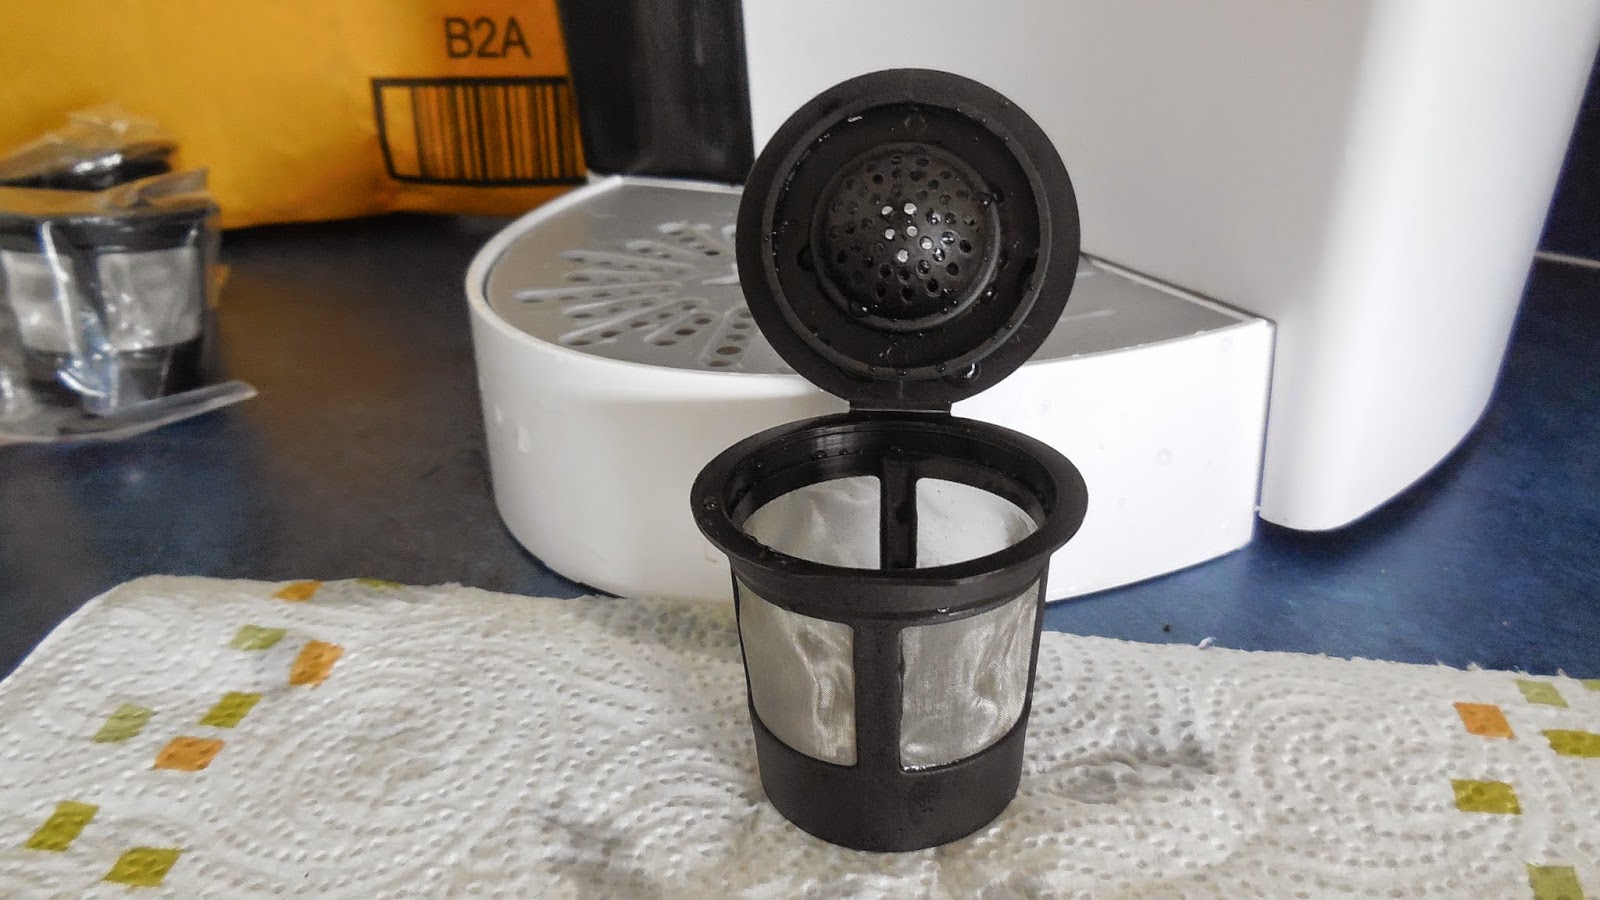
I suggest you get yourself one of these:
It was available as a four pack from Amazon, for about $12 for the four of them. Target probably has them, too. It fits inside the coffee maker just like one of the K cups, and does not require that you modify the coffee maker in any way. It does not work for the Keurig version 2.0 series, the new ones that require a K-cup with a micro chip in it so that you can only use "approved" coffees. (I have tried this one, it works fine.) I like the coffee, too! (And "thank you" to NCW for the suggestion.)
Thursday, January 1, 2015
New Year's Day -- Black Eyed Peas -- After supper edit
Last things first, here's a shot of my dinner plate with all of the traditional southern elements on it. Black eyed peas, greens, pork and corn bread. Served with a little sprinkle of hot sauce. Done and done. I won't have to cook again for a month.
Southern food traditions are not new to me -- I can and do eat grits now and then, for example. But I've never tried the New Year's tradition of black eyed peas. Research on the internet gave me two recipes that seemed within my skill set, and though there are lots of variations on this one, I stuck with a fairly basic approach. It's based largely on a recipe by Emeril. This all started when I walked into a local supermarket and saw a table stacked high with one pound bags of blacked eyed peas, marked down to $1.29 (from $1.59).
Last night, after chatting with my favorite teenagers on earth over Skype, I put the beans in a pot, added 6-8 cups of water as directed on the package, and left them on the counter over night to soak. This is how they looked this morning. Drain and rinse. Repeat. Set the beans/peas aside.
Recipes of this type are guidelines, no chemistry involved, unlike baking. Research had indicated that this could be bland, so I chose two different kinds of pork products to flavor it. The thick sliced hickory smoked bacon -- about a half pound. And a cup of diced leftover Christmas ham. All the recipes I saw also called for at least one whole onion. This is a large sweet onion.
This cast of characters photo (below) is a little misleading. Because I used bacon, I never used the olive oil. And since I used bacon and couldn't find a low sodium chicken broth, I didn't use the salt either.
Brown up the bacon, add the onion and ham and -- this is a lot -- 2 tablespoons of minced garlic.
Also add two bay leaves, a half teaspoon or so of thyme, and as much pepper as you like.
Cook all of this until you've rendered most of the fat out of the bacon and the onions are soft.
Add a full quart of chicken broth (4 cups) plus one cup of water to the pot. Add the peas/beans at this point, and stir. Bring the mixture to a boil, cover and reduce the heat to low. Simmer for 25 minutes.
Remove the cover and continue to cook uncovered for another 25 minutes on medium-low heat or until the beans/peas are tender. Adjust seasonings to your taste. Variations include celery, red bell pepper, ham hocks, canned diced tomatoes and stir in torn up kale when 5 minutes of cooking time remain. Serve as a side dish with greens, cornbread and a pork main dish. Add rice to it and you can call it Hoppin' John, another traditional southern New Year's dish.
Or you can cut a small piece of cornbread in half and ladle up some black eyed peas over the top. Add some hot sauce of your choice -- but be sure to get plenty of pot liquor. And always remove bay leaf from anything you've cooked before you dig into it. This was really, really yummy for lunch today. It'll also be served with greens and a pork tenderloin for supper tonight. And cornbread. Which is a whole other story.
Saturday, September 27, 2014
Kielbasa, homemade kraut and squash
We have done a fair amount of experimenting with the various widely available sausages this outdoor cooking season. We have discovered that even above the wildly popular bratwurst that our favorite is the kielbasa, Polish sausage.
So a couple of days ago I scored a couple of big Polish. That day we had meat and I like to season the sausage by putting it on the grill along with the meat. That grilled meat taste is incorporated into the sausage and then we try to take advantage of that in some later usage of the big sausage.
Which leads us to this evening's meal. We have previously done some things with the spaghetti squash which were pretty much duplicated this evening. Bake the squash, mix in some butter and fresh parmesan cheese and some fresh cut tomatoes and peppers.
The tomatoes and peppers don't exactly cook but the heat from the squash renders everything into a single dish. Squash with tomatoes and some still slightly crisp peppers.
The new addition to the equation is homemade sauerkraut.
It was excellent.
The obvious question seems to me to be where does one obtain home made sauerkraut.
You make it yourself, that's how.
All of the articles I read said making your own kraut would produce a sauerkraut better than what you are used to when buying from the deli or supermarket.
Yup.
It is easy but it does require some hand work. I expect to soon enough provide a post with details as I prepare my second batch.
Subscribe to:
Posts (Atom)